Tuesday, September 29, 2009

Espresso-Chocolate Shortbread Cookies

Aahhh, espresso... my drug of a choice. The rich aroma and dense flavor has the magic ability to brighten any day. In Europe I enjoyed some of the best espresso/coffee drinks EVER...
from Cappucino in Cinque Terre...


to Frappe in Mykonos...


Now that I'm back in Chicago I am on a mission to find a place that can live up to my high coffee expectations; pulling a fresh and artfully perfect shot of espresso. There's something about the super automatic espresso machines (STARBUCKS, yuck) that takes away from the experience of watching a talented barista grind the coffee by hand....

Tonight, in an attempt to satisfy my craving for both chocolate and coffee I made some Espresso-Chocolate Shortbread Cookies. These are easy to make, full of flavor with the perfect mix of crunchy softness (they smell great too).
Happy baking!
Espresso-Chocolate Shortbread Cookies
adapted from Dorie Greenspan's Baking: From My Home To Yours

Makes 32 cookies

- 1 tbsp instant espresso powder *
- 1 tbsp boiling water
- 2 sticks (8 ounces) unsalted butter, room temperature
- 2/3 cup confectioners’ sugar
- 1/2 tsp pure vanilla extract
- 2 cups all-purpose flour
- 4 ounces bittersweet chocolate finely chopped, or 3/4 cup store-bought mini chocolate chips **
- Confectioners’ sugar, for dusting (optional)

* I used freshly made Caffe Kimbo espresso because I did not have any instant powder. The cookies still had great flavor.
**I used semi-sweet chocolate

Directions:
  1. Dissolve the espresso in the boiling water, and set aside to cool to tepid
  2. Working with a stand mixer, preferably fitted with a paddle attachment, or with a hand mixer in a large bowl, beat the butter and confectioners’ sugar together on medium speed for about 3 minutes, until the mixture is very smooth. Beat in the vanilla and espresso, then reduce the mixer speed to low and add the flour, mixing only until it disappears into the dough. Don’t work the dough much once the flour is incorporated. Fold in the chopped chocolate with a sturdy rubber spatula.

  3. Using the spatula, transfer the soft, sticky dough to a gallon-size zipper-lock plastic bag. Put the bag on a flat surface, leaving the top open, and roll the dough into a 9 x 10 1/2 inch rectangle that’s 1/4 inch thick. As you roll, turn the bag occasionally and lift the plastic from the dough so it doesn’t cause creases. When you get the right size and thickness, seal the bag, pressing out as much air as possible, and refrigerate the dough for at least 2 hours, or for up to 2 days.

  4. Position the racks to divide the oven into thirds and preheat the oven to 325 degrees F. Line two baking sheets with parchment or silicone mats.

  5. Put the plastic bag on a cutting board and slit it open. Turn the firm dough out onto the board (discard the bag) and, using a ruler as a guide and a sharp knife, cut the dough into 1 1/2-inch squares. Transfer the squares to the baking sheets and carefully prick each one twice with a fork, gently pushing the tines through the cookies until they hit the sheet.

  6. Bake for 18 to 20 minutes, rotating the sheets from top to bottom and front to back at the midway point. The shortbreads will be very pale–they shouldn’t take on much color. Transfer the cookies to a rack.

  7. If you’d like, dust the cookies with confectioners’ sugar while they are still hot. Cool the cookies to room temperature before serving


Sunday, September 27, 2009

Caramel-Glazed Blondies

In order to impress some people I hadn't yet met, I whipped up some blondies for a UGA football viewing party. Everyone loved the yummy treats, and Georgia won the game, so it was a win-win all around. Because I was a little rushed to make it in time to "Call the Dawgs" during kick-off, I may have shaved off some of the cooling and setting times that you'll see below. It turned out just as well as if I would have waited longer - impatience sure paid off.

I've made some suggestions to the recipe below that you won't see reflected in the pictures. While the version I made were quite good, it was missing texture. My suggestions should definitely fix that problem.

Katie, I think it's time that you get to blogging. What are you waiting for? Your sister is showing you up big time, especially with two posts on one day.

Caramel-Glazed Blondies (adapted from "Cookies, Brownies & Bars"):
Makes 25 blondies (mine only made 16, but maybe I cut mine too big?)

for the blondies:
1/2 cup unsalted butter
1 1/2 cups light brown sugar, firmly packed
1 1/2 cups flour
1 tsp. baking powder
1/4 tsp. salt
2 large eggs
1 tsp. vanilla extract
6 oz. white chocolate chips
6 oz. chopped nuts

Preheat the oven to 325 degrees. Press aluminum foil into the bottom and over the sides of a 9-by-9-inch baking pan. Butter the foil.

In a saucepan, combine the butter and light brown sugar. Warm over medium heat, stirring often, until melted and smooth. Don't worry if the sugar doesn't dissolve completely or if the mixture boils - both are a-okay. Scrape into a large bowl and let cool slightly. In a small bowl, sift together the flour, baking powder, and salt; set aside. Add the vanilla and the eggs to the large bowl and use a large spoon to mix until smooth. Add the flour mixture, chocolate chip and nuts, and stir just until incorporated. Pour the batter into the prepared pan. Bake until a toothpick inserted in the center comes out with moist crumbs attached, about 20-25 minutes. Transfer to a wire rack and let cool until room temperature, about 1 hour.


for the caramel glaze:
1/4 cup unsalted butter
1/2 cup heavy whipping cream
3/4 cup dark brown sugar, firmly packed
1 tsp. vanilla extract
1/2 cup confectioners' sugar

In a saucepan, combine the butter, cream and brown sugar. Warm over medium heat, stirring constantly, until melted. Increase the heat to medium-high and boil for 2 minutes. Remove from the heat and stir in the vanilla. Let cool.* Sift the confectioners' sugar into a bowl, then whisk in the cooled brown sugar mixture to make a smooth glaze. Spread the glaze evenly over the cooled blondies, still in the pan. Let stand until set, about 30 minutes.


Holding the ends of the foil, life the blondies out to cut using a warmed knife. These can be stored in an airtight container in the fridge for up to 3 days. I suggest refrigeration, then heating in the microwave right before eating. Adding a scoop of vanilla ice cream would make these utterly fantastic.


*At this point, this mixture will provide for the most heavenly, tempting smell your kitchen has ever witnessed. This intoxicating smell will urge your senses for just a taste, but resist the urge! I can tell you that even after it has cooled, it's still boiling hot. I put my finger in for a taste, then realized it was on fire. My next thought was to extinguish the blaze, and my first reaction was to put my finger in my mouth, which ended up burning my tongue too. It really doesn't pay to sacrifice taste buds, so just wait for the finished product.

Cinnamon Rolls... a work in progess.


I'm trying to learn how to make some of the more difficult bakery items and this morning I had my first go at making cinnamon rolls. Over all, they tasted good but the dough was a little tough. Making dough from scratch is a bit tricky... it can be very temperamental if everything is not exactly right. I'm sure if I had a bread machine this task would have been much easier.


Another problem - I didn't let the dough rise to its full potential because I was trying to have them finished before Georgie went back to school. Unfortunately I rushed the rolls and they still weren't done in time for the little guy to take with. bummer.

Here are a couple pictures from attempt #1. I will post a recipe when the end product improves.

Marbled Cheesecake Brownies


Did I mention that I reallllllly like chocolate? This is the from scratch version of this delicious treat; if you are in a time crunch, you can use a boxed brownie mix to whip these up in no time.

Enjoy.


Marbled Cheesecake Brownies

Adapted from Smitten Kitchen

Brownie batter
- 1 stick (1/2 cup or 4 ounces) unsalted butter, cut into pieces
- 3 ounces unsweetened chocolate, chopped
- 1 cup sugar
- 2 large eggs
- 1/2 teaspoon pure vanilla extract
- 2/3 cup all-purpose flour

Cheesecake batter
- 8 ounces cream cheese, well softened
- 1/3 cup sugar
- 1 large egg yolk
- 1/4 teaspoon pure vanilla extract

Plus
- 1/2 cup semisweet chocolate chips

Make brownie batter:
Preheat oven to 350 degrees. Butter an 8-inch square baking pan. Heat butter and chocolate in a 3-quart heavy saucepan, whisking occasionally, just until melted. Remove from heat and whisk in sugar, eggs, vanilla, and a pinch of salt until well combined. Whisk in flour until just combined and spread in baking pan.

Make Cheesecake batter:
Beat together cheesecake ingredients, then dollop over brownie mix. Using a knife swirl the cheesecake mixture into the brownie batter to create the marbled effect. Sprinkle chocolate chips over the top.

Bake until center is set and edges of brownies are slightly puffed - about 35 minutes.
Let brownies cool completely before cutting, these are best served cold.

Sunday, September 20, 2009

Chocolate Pudding Pie

Since I live in Atlanta, I decided my first post would be a pie (also after my roommate Mollie'srequest for a pie). In the South, pie is king. You can order a piece of pie at any restaurant, and since I've never made a pie before, I decided to try one tonight. After making this delicious pie, however, I have a few tips:

1. Don't start making a pie after 6 p.m. It's a 4-plus hour endeavor according to my calculations. Not a good idea if you have to get up for work in the morning.
2. Make sure you have all the equipment before making the dough. For instance, it may be a good idea to check if you have a pie pan. I didn't and regretted every second of having to go back to the grocery store a third time tonight.
3. It's best not to cook on the day you bring a new puppy home. Let's just say Lulu ended up wearing some of the flour, which I normally reserve for my hair.

Pie Dough (adapted from Smitten Kitchen):

Makes enough for one double-crust pie.

1 cup water
2 1/2 cups flour
1 tablespoon sugar
1 teaspoon salt
1 cup unsalted butter, very cold, cubed (2 sticks)

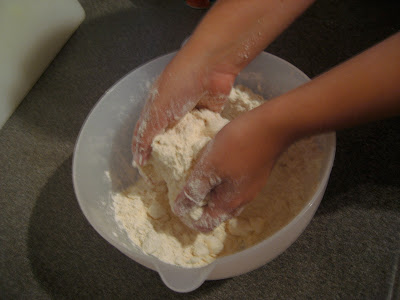
Start by filling one cup liquid with water, and add a few ice cubes; set it aside. In a large bowl, whisk together 2 1/2 cups flour, 1 tablespoon of sugar and a teaspoon of salt. Cube two sticks of very cold unsalted butter into 1/2-inch pieces. Get out your pastry blender (I didn't use a pastry blender - instead I used a fork and some elbow grease). Sprinkle the butter cubes over the flour and begin working them in with the pastry blender, using it to scoop and redistribute the mixture as needed so all parts are worked evenly. When all of the butter pieces are approximately the size of peas, (which won't take long if you've used the pastry blender, a little longer if you used a fork) stop. Yes, even if it looks uneven.


To glue it all together, start by drizzling 1/2 cup of the ice-cold water (but not the cubes, if there are any left) over the butter and flour mixture. Using a rubber or silicon spatula, gather the dough together. You’ll probably need an additional 1/4 cup of cold water to bring it together, but add it a tablespoon as a time. Once you’re pulling large clumps with the spatula, take it out and get your hands in there. Gather the damp clumps of dough together into one mound, patting it together. You can store the dough by dividing it in half, and place each half on a large piece of plastic wrap, shaping it into a disk (it will be easier to roll out later). Let the dough chill in the fridge for one hour, but preferably at least two, before rolling it out.

Pudding Filling (also adapted from Smitten Kitchen):
1/4 cup cornstarch
1/3 cup plus 2 tablespoons sugar, divided
3 tablespoons unsweetened cocoa powder
1/4 teaspoon salt
3 cups whole milk
4 ounces semisweet chocolate, finely chopped
1 teaspoon pure vanilla extract
1 cup chilled heavy cream

Bittersweet chocolate shavings for garnish (optional)

Prepare pie dough by rolling out dough on a lightly floured surface with a lightly floured rolling pin into an 11-inch round, then fit into a 9-inch pie plate. Trim edge, leaving a 1/2-inch overhang, then fold overhang under and crimp edge decoratively (unless you didn't have enough edge to trim, like I did. I think mine was more frantic than decorative). Prick bottom and side of shell all over with a fork, then freeze rolled-out shells for 20 to 30 minutes until solid, afterwards pressing a piece of buttered foil, buttered side down, very tightly against the frozen shell. While shell is in freezer, preheat oven to 375°F with a baking sheet on middle rack.

Bake on baking sheet until pastry is set and edge is pale golden, about 25 minutes. Carefully remove foil, and press any part of the crust that has bubbled up gently back with the back of a spoon and continue baking the shell on baking sheet until pale golden all over, 15 to 20 minutes more. Cool shell.


To make the pudding filling, whisk together cornstarch, 1/3 cup sugar, cocoa powder, and salt in a 2-quart heavy saucepan, then gradually whisk in milk. Bring to a boil over medium heat, whisking constantly, then boil, whisking, two minutes (mixture will thicken). Remove from heat and whisk in chocolate and vanilla until smooth.

Pour filling into cooled shell and chill, its surface covered with wax paper to prevent a skin from forming, until cold, at least two hours.


Just before serving, beat cream with remaining two tablespoons sugar until it just holds soft peaks. Spoon onto pie and garnish with bittersweet chocolate shavings or stripes of melted caramel. I used piece of Dove chocolate that I had in the kitchen already because I'm headed to DC tomorrow, and my coworkers will be enjoying this delicious treat instead of me.

Saturday, September 19, 2009

Peanut Butter Crispy Bars, a Baked NYC recipe


oh.my.god.

Creamy milk chocolate peanut butter, decadent dark chocolate and the perfect amount of crunch…. This is the ultimate dessert in perfected form. I made these for my friends at work for my first day back. Thankfully I was able to remove them from my house before I managed to eat the entire batch by myself.


Peanut Butter Crispy Bars
Adapted from Baked: New Frontiers in Baking

For the Crispy Crust
- 1 ¾ cups crisped rice cereal
- ¼ cup sugar
- 3 tablespoons light corn syrup
- 3 tablespoons unsalted butter, melted

For the Milk Chocolate Peanut Butter Layer
- 5 ounces good-quality milk chocolate coarsely chopped (I used ghiradelli)
- 1 cup creamy peanut butter (I used Natural Jif)

For the Chocolate Icing
- 3 ounces dark chocolate (60 to 72% cacao), coarsely chopped
- ½ teaspoon light corn syrup
- 4 tablespoons (1/2 stick) unsalted butter

Make the Crispy Crust:
Lightly spray a paper towel with nonstick cooking spray and use it to rub the bottom and sides of an 8-inch square baking pan.

Put the cereal in a large bowl and set aside.

Pour ¼ cup water into a small saucepan. Gently add the sugar and corn syrup (do not let any sugar or corn syrup touch the sides of the pan) and use a small wooden spoon to stir the mixture until just combined. Put a candy thermometer in the saucepan. Cook over medium-high heat and bring to a boil; cook until the mixture reaches the soft ball stage, 235 degrees F.

Remove from the heat, stir in the butter, and pour the mixture over the cereal. Working quickly, stir until the cereal is thoroughly coated, then pour it into the prepared pan. Using your hands, press the mixture into the bottom of the pan (do not press up the sides). Let the crust cool to room temperature while you make the next layer.

Make the Milk Chocolate Peanut Butter Layer:
In a large nonreactive metal bowl, stir together the chocolate and peanut butter. Set the bowl over a saucepan of simmering water and cook, stirring with a rubber spatula, until the mixture is smooth. Remove the bowl from the pan and stir for about 30 seconds to cool slightly. Pour the mixture over the cooled crust. Put the pan in the refrigerator for 1 hour, or until the top layer hardens.

Make the Chocolate Icing:
Combine the chocolate, corn syrup and butter in a large nonreactive metal bowl and follow the same steps as the Milk Chocolate Peanut Butter Layer.

Once you pour the chocolate icing over the chilled milk chocolate layer, refrigerate the pan for 1 hour or until the top hardens.

Cut into 9 squares and serve. The bars can be stored in the refrigerator, covered tightly, for up to four days.


Thursday, September 17, 2009

Classic Banana Bread


I was over at Nani’s house the other day where she had 4 black spotted bananas sitting on her counter. The bananas with their dark mushy spots and potent smell were almost perfectly ripe for banana bread. With the thought of banana bread now stuck in my head I stole the bananas from my poor grandma and brought them home to start baking.

Lately, I have been using Aunt Kathy’s recipe- it’s perfection. Using low-fat yogurt instead of 2 sticks of butter makes it moist without all the fat. I like to top the bread off with brown sugar before baking to give it a sweet crunchy crust.

I promise to bring Nani and Potch some banana bread, it's only fair... they were her bananas.


Classic Banana Bread:
• 2 cups all-purpose flour
• ¾ teaspoon baking soda
• ½ teaspoon salt
• 1 cup sugar
• ¼ cup butter, room temperature
• 2 large eggs
• 1 ½ cups mashed ripe bananas (about 3 bananas)
• 1/3 cup plain low-fat yogurt
• 1 teaspoon vanilla extract
• brown sugar for sprinkling (optional)

Preheat oven to 350 degrees. Combine flour, baking soda and salt in small bowl and stir with a whisk to combine. Place sugar and butter in a large bowl and beat with an electric mixer until light and fluffy. Add eggs one and at a time and beat well to combine after each addition.

In a small bowl mash bananas, yogurt and vanilla together. Add banana mixture to the butter and beat until blended. Add the flour mixture in 2 parts; beat at low speed just until moist. Spoon batter into a well greased loaf pan (8 ½ x 4 ½ in.) or 3 mini loaf pans. *Sprinkle a layer of brown sugar over the top before baking.
Bake at 350 degrees for 1 hour or until a wooden pick inserted in center comes out clean. ** When using the mini loaf pans they may not require a full hour, watch carefully.

Leave bread to cool in pan for 10 minutes on a wire rack then remove from pan.

Monday, September 14, 2009

Chocolate Ganache Cupcakes


Chocolate is a passion of mine. I love it, need it, have to have it.... sweet, bitter, dark, milky, melted, chips, chunks, sauce, syrup, with pastry, on fruit, with peanut butter or hazelnut, ah the possibilities are endless.
My mom told me about an Ina Garten recipe for Chocolate Cupcakes with Chocolate Ganache, she had already purchased the ingredients so I just had to throw it all together.

These little babycakes are fabulous, rich with chocolate and perfectly moist. This is definitely a recipe that will be a repeat... I’m thinking a layer cake variation?

Anyway, I found out that my cousin Nikki had made these cupcakes over the weekend and raved about the recipe to my Mom. So here is my version of the Ina Garten recipe. Make these, enjoy them, they might be the best homemade cupcake I’ve made, ever.


Chocolate Ganache Cupcakes
Adapted from Ina Garten

Ingredients
  • ½ cup unsalted butter, room temperature
  • 1 cup sugar
  • 4 eggs
  • 16 ounces Hershey’s chocolate syrup
  • 1 tbsp. vanilla
  • 1 cup flour

Ganache:
  • 8 ounces Semi-Sweet Chocolate Chips
  • ½ cup heavy cream
  • 1 tsp instant coffee granules

Preheat oven to 350 degrees. Using an electric mixer with a paddle attachment beat the butter and sugar until fluffy. Add the eggs one at a time. Stir in the chocolate syrup and vanilla. Add the flour and mix until combined, be careful not to over-mix the batter or the cupcakes may become tough.

Pour batter into cupcake tins and bake for 25-30 minutes.

For the ganache:
Using a double broiler, melt the chocolate chips, cream, and coffee granules together, stir the mixture until it becomes smooth.

Dip warm cupcakes in the ganache and then cool on a wire rack.

I topped my cupcakes with small pieces of a chopped Hershey’s Skor bar to add a little crunch. Mmm… enjoy.

Sunday, September 6, 2009

Broiled Peaches and Meringue - First post!!


Graduation has come and gone, my euro-trip too has passed and I find myself with free time, and lots of it. With this newfound free time I have decided to try my hand at blogging, dedicating Cookie Confessions to my adventures in the kitchen; reporting successes and failures as I attempt to learn the art of baking.

I made a practice round of these peaches, as I didn't want it to be a disaster when it was time to serve dessert. I must say the slightly caramelized peach is delicious and turns out, meringue may be one of my new favorite toppings! It’s ironic that my first post does not require any real baking, nonetheless, enjoy the last of the summer peaches with this one!


Broiled Peaches and Meringue
Adapted from Gourmet Magazine, August 2009

Ingredients
o 2 large peaches, halved and pitted
o 3 tbsp plus 1 teaspoon sugar
o 1 large egg white, room temperature

Preheat broiler. Place peaches, cut side up on a baking sheet and sprinkle each one with ¼ teaspoon of sugar. Place peaches in the broiler 4-5 inches away from the heat just until the top begins to brown. This took me about 2 minutes to achieve caramelized color.

For Meringue: Beat egg white and a pinch of salt with an electric mixer on medium speed just until the egg white appears foamy. Gradually add in the remaining 3 tablespoons of sugar, continuously beating until the egg white becomes stiff and forms peaks.

Add a generous dollop of meringue to each peach and then place the baking sheet back into the broiler. Watch the meringue very closely; it takes only 15-20 seconds to brown the tips of the meringue.

Note: The recipe in Gourmet called for sesame candy to incorporate in the meringue, I didn’t have any and I don’t think my version needed it.

*One more thing…please note the egg white in the meringue is not fully cooked.